
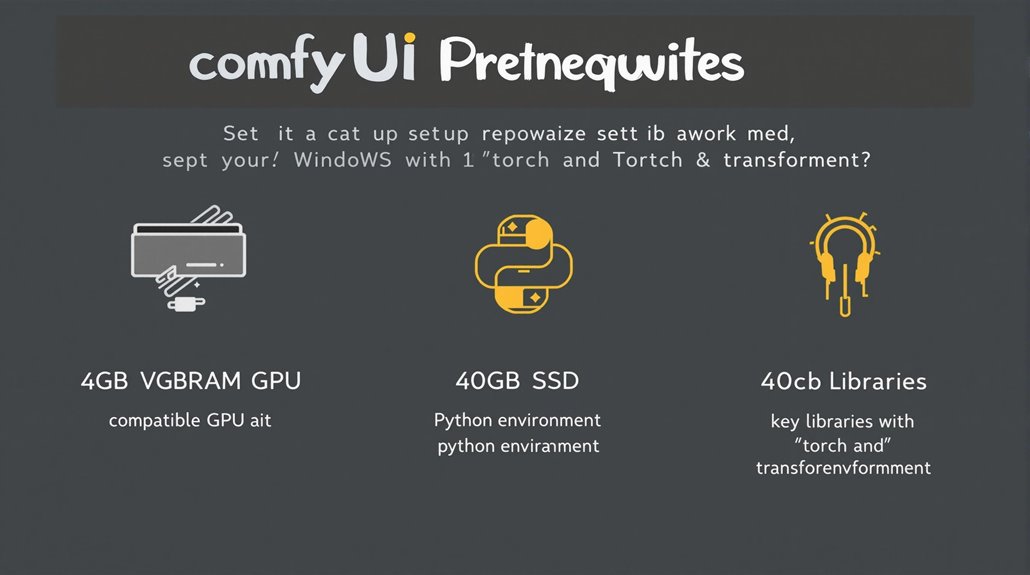
Setting up ComfyUI on Windows 11 requires meeting specific system requirements. You need a compatible NVIDIA GPU with at least 4GB VRAM, 8GB of system RAM, and a Python environment with essential libraries like ‘torch’ and ‘transformers’.
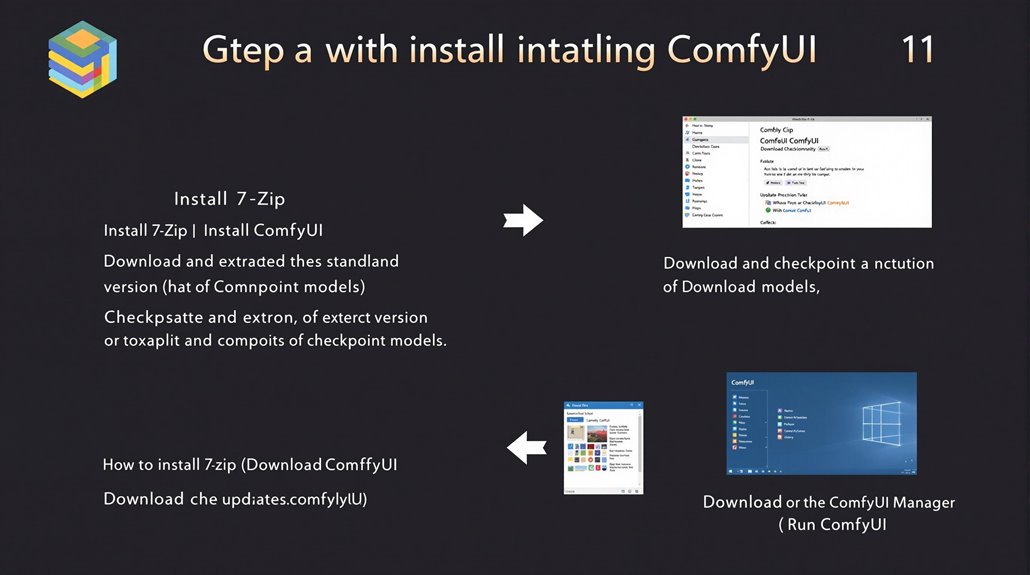
Download the standalone version of ComfyUI and extract it using 7-Zip. This ensures easy access to the necessary files and directories.
Place a checkpoint model in the ‘ComfyUI\ComfyUI\models\checkpoints’ directory within ComfyUI’s installation folder. This model is crucial for ComfyUI to function properly.
To start, run either ‘run_nvidia_gpu.bat’ for NVIDIA GPU users or ‘run_cpu.bat’ for those without an NVIDIA GPU. This setup guarantees basic functionality, but a detailed understanding of ComfyUI’s configuration and troubleshooting is necessary to fully utilize its capabilities.
Key System Requirements:
NVIDIA GPU with 4GB VRAM
8GB System RAM
Python Environment with ‘torch’ and ‘transformers’
For optimal performance, consider using an NVIDIA RTX 2070 or newer with 8GB+ VRAM and Tensor cores for faster AI acceleration.
Table of Contents Toggle
- Key Takeaways
- Prerequisites for ComfyUI
- Downloading and Installing ComfyUI
- Configuring ComfyUI
- Installing ComfyUI Manager
- Basic Usage of ComfyUI
- Connecting Nodes in ComfyUI
- Troubleshooting ComfyUI Issues
- Updating ComfyUI and Dependencies
- Advanced ComfyUI Features**
Key Takeaways
Setting Up ComfyUI on Windows 11: Key Steps
Download and Extract ComfyUI: Download the standalone version of ComfyUI and extract it using 7-Zip to a directory on your Windows 11 system.
System Requirements: Ensure at least 4GB VRAM with a compatible NVIDIA GPU, 8GB system RAM, and a modern processor.
Install and Run: Place a checkpoint model in the appropriate directory and run the ‘run_nvidia_gpu.bat’ file to start ComfyUI, accessing the GUI via a generated URL.
Detailed Steps:
Extract ComfyUI: Extract ComfyUI using 7-Zip to a directory.
System Needs: Use a compatible NVIDIA GPU with 4GB VRAM, 8GB system RAM, and a modern processor.
Run ComfyUI: Place a checkpoint model in the ComfyUI directory and run the ‘run_nvidia_gpu.bat’ file. Access ComfyUI via http://127.0.0.1:8188/.
Prerequisites for ComfyUI
System Requirements for ComfyUI
To ensure ComfyUI runs efficiently, specific hardware and software prerequisites must be met.
Storage: An SSD is highly recommended for faster loading and running of model files, with at least 40GB of hard disk space required.
Software: A Python environment is necessary, which is embedded in the installation package. Key Python libraries like ‘torch’ and ‘transformers’ need to be installed. Some plugins may require Git. For smooth operation, Windows 11 or later is the recommended operating system.
Additionally, a compatible GPU with at least 4GB VRAM is required for optimal performance.
Checking these prerequisites confirms that ComfyUI can be installed and run efficiently. It’s essential to refer to the official documentation for any updates to these requirements.
Downloading and Installing ComfyUI
Key Steps for ComfyUI Installation
Install 7-Zip: Download 7-Zip software to uncompress ComfyUI’s zip file.
Download ComfyUI: Download the standalone version of ComfyUI and extract it using 7-Zip.
Download Checkpoint Models: Download and place a checkpoint model in the appropriate directory within ComfyUI’s installation folder.
Regular Updates
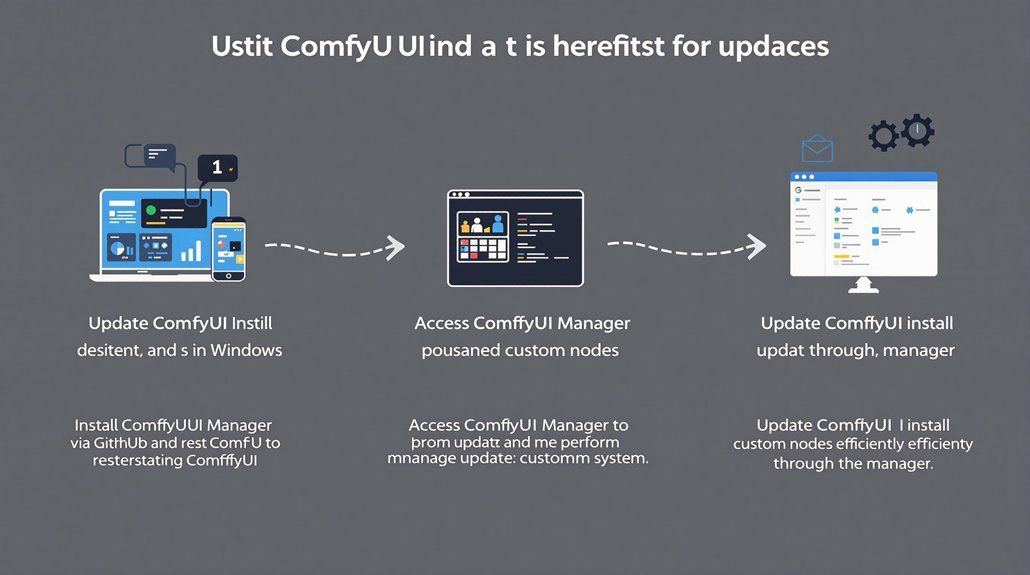
For users who installed ComfyUI manually or using the official portable version, updates can be performed by navigating to the ComfyUI installation directory and running the ‘update_comfyui.bat’ file. This ensures that ComfyUI and its dependencies remain updated.
Using ComfyUI Manager
For users who have installed ComfyUI-Manager, updates can be done by clicking the ComfyUI Manager icon in the system tray and selecting “Update ComfyUI”. This method provides a straightforward way to keep ComfyUI updated.
ComfyUI also offers highly customizable workflows by allowing users to create and connect various nodes, making it easy to tailor the interface for unique project requirements.
To run ComfyUI efficiently, ensure your system has at least an NVIDIA GPU with 4GB VRAM.
Configuring ComfyUI
Configuring ComfyUI for Efficient Image Generation
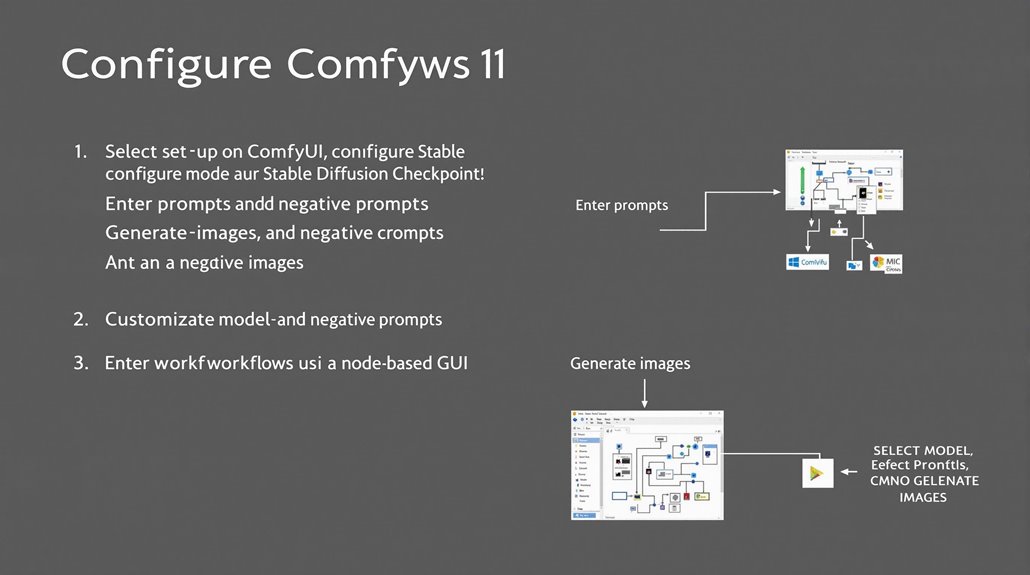
To start generating images with ComfyUI, select a Stable Diffusion Checkpoint model in the Load Checkpoint node. Ensure the models are correctly configured to prevent errors.
**Creating **Custom Workflows
Enter prompts and negative prompts in the CLIP Text Encode (Prompt) nodes to tailor your image generation process. Queue prompts to generate images and save or view them as needed.
Model Optimization
Accurate model selection and configuration are crucial for efficient image generation. Custom workflows allow users to adjust their image generation processes to specific needs, improving productivity and output quality. The transparency of the data flow in ComfyUI’s node-based GUI facilitates easier identification of errors and adjustments during the image generation process. ComfyUI is designed to operate smoothly with a modern processor like an Intel Xeon E5 and sufficient RAM.
Key Steps for Workflow Creation
Select a Model: Choose a Stable Diffusion Checkpoint model in the Load Checkpoint node.
Enter Prompts: Use the CLIP Text Encode (Prompt) nodes to enter prompts and negative prompts.
Generate Images: Queue prompts to generate images and save or view them accordingly.
Customizing Workflows
Custom workflows in ComfyUI enable users to create personalized image generation processes. By configuring models accurately and entering specific prompts, users can achieve optimal results tailored to their needs.
Custom workflows allow for a high degree of flexibility, enabling users to fine-tune every aspect of the image generation process. This includes adjusting model parameters, selecting different checkpoint models, and crafting detailed prompts that guide the output.
Installing ComfyUI Manager
Installing ComfyUI Manager
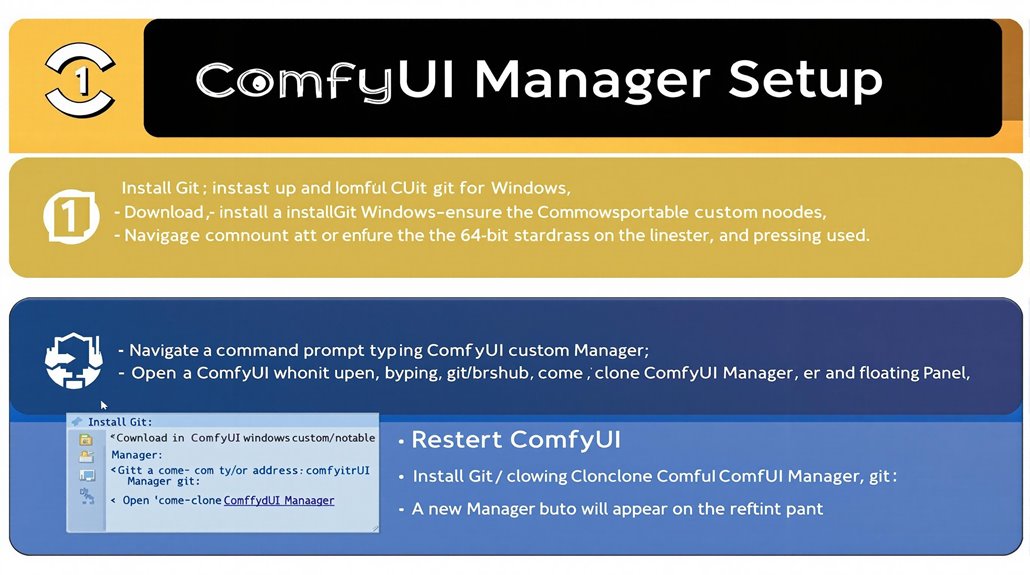
To manage and update custom nodes, ComfyUI Manager is essential. Start by ensuring Git is installed on your system.
Navigate to the ‘ComfyUI_windows_portable > ComfyUI > custom_nodes’ folder using Windows Explorer. Open a command prompt in this folder by typing ‘cmd’ in the address bar and pressing Enter.
Execute the command:
”’bash
git clone https://github.com/ltdrdata/ComfyUI-Manager.git
”’
Wait for the cloning process to complete. Upon successful cloning, restart ComfyUI. A new Manager button will appear on the floating panel, allowing for seamless management and updates of custom nodes through the Manager Interface.
This integration is crucial for maximizing ComfyUI’s potential. For optimal performance, ensure your system meets the necessary hardware requirements, particularly for Apple devices, which require Apple Silicon (M1/M2) and recent macOS versions.
Troubleshoot any issues by verifying Git installation and opening the command prompt in the correct folder to ensure a smooth installation process.
Restarting ComfyUI after cloning is key to activating the Manager interface, which helps manage and update custom nodes efficiently.
The latest version of ComfyUI, such as version 0.2.2, should be downloaded and extracted into the “ComfyUI” folder to ensure compatibility with the manager.
Basic Usage of ComfyUI
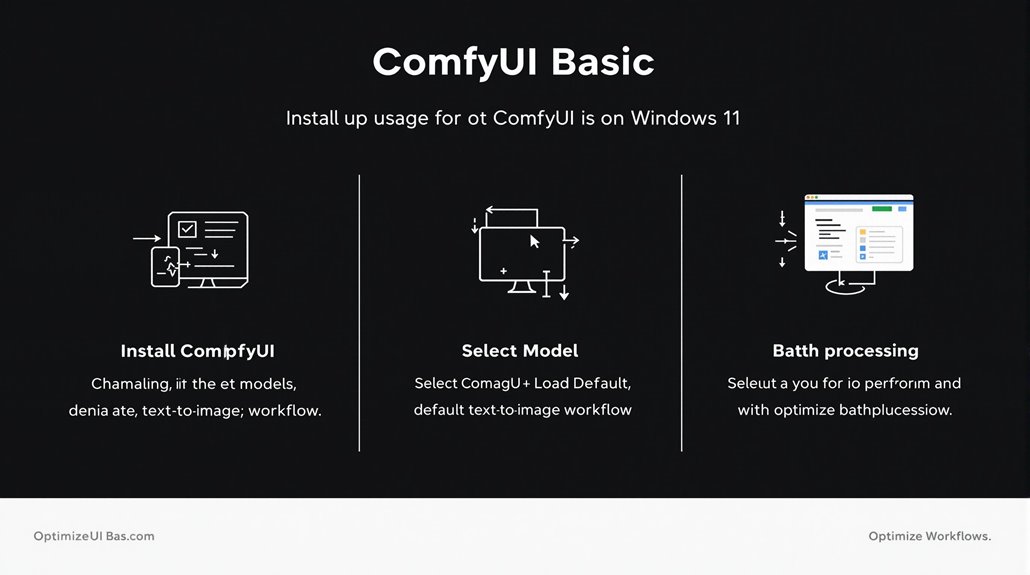
Understanding ComfyUI Basics
ComfyUI’s default text-to-image workflow provides a straightforward starting point. Upon launching ComfyUI, the default workflow is displayed. If not, clicking “Load Default” returns you to it.
Workflow Transparency
ComfyUI shows the exact process, making it easier to understand and manipulate the workflow. Users can customize nodes through the ComfyUI Manager interface, enabling complex workflows tailored to specific tasks and preferences.
Navigating and Configuring ComfyUI
To manage and arrange elements within the workflow, use zoom controls, node connections, and workspace navigation. Understanding these basics is vital for optimizing ComfyUI’s performance for AI-based image generation.
The main menu offers options to save and load workflows, update graphs, and reset views. The interface is simple and easy to use, with clear labels like Queue size and Refresh.
To perform efficient model management, ComfyUI users should also install ComfyUI Manager. For proper extraction of Comfy UI files, use 7-Zip or WinRAR.
Customizing ComfyUI
Users can add custom nodes to create workflows that suit their needs. This flexibility allows for advanced image generation tasks, such as generating images with transparent backgrounds using the LayerDiffuse workflow.
Optimizing Performance
To get the most out of ComfyUI, learn how to use tools like batch processing. Optimize different configurations by understanding how seed values control image variations. Use increment and decrement settings for batch processing to further enhance performance.
Connecting Nodes in ComfyUI
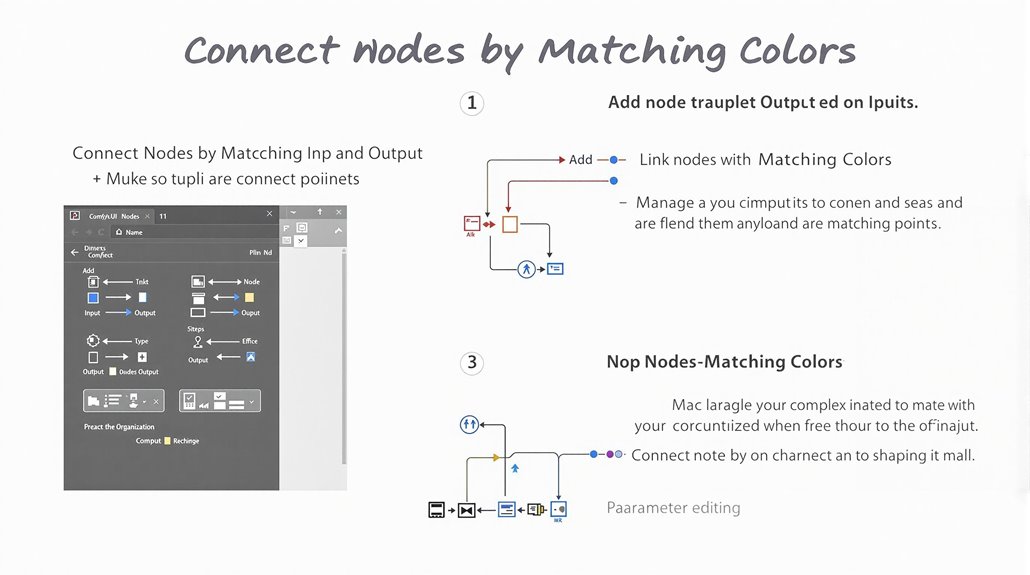
Connecting Nodes in ComfyUI
When building a workflow in ComfyUI, connecting nodes is crucial for creating a functional image generation pipeline. Nodes are added by right-clicking on blank space and selecting “Add Node” or double-clicking to search and add nodes.
Node Compatibility
Each node has colored input and output points that must match to connect. To establish a connection, users drag an output point to an input point of the same color, a process known as linking nodes.
Linking Strategies
Careful planning is necessary to guarantee seamless data flow. Disconnecting is achieved by clicking on a connection point and dragging away or by deleting a link via the small circle on the link. The efficiency of these linking strategies is heavily influenced by the workflow organization techniques employed by the user.
Node Interface
The node interface allows for editing parameters and renaming nodes through a right-click menu.
Organizing nodes with different colors helps in managing complex workflows.
Effective Node Management
Understanding and applying linking strategies is essential for creating efficient and effective workflows in ComfyUI.
Effective node management and connection techniques are crucial for leveraging ComfyUI’s full capabilities.
Managing Nodes
Nodes can be organized by color to help manage complex workflows.
The node interface provides options to edit parameters and rename nodes, making it easier to understand the workflow at a glance.
Connection Techniques
Connections between nodes are made by dragging an output point to an input point of the same color.
Disconnecting is done by clicking on a connection point and dragging away or by deleting a link via the small circle on the link.
ComfyUI was developed primarily for its flexibility and control, offering advanced node-based workflows that can significantly enhance the image generation process compared to more user-friendly alternatives like Automatic1111.
Troubleshooting ComfyUI Issues
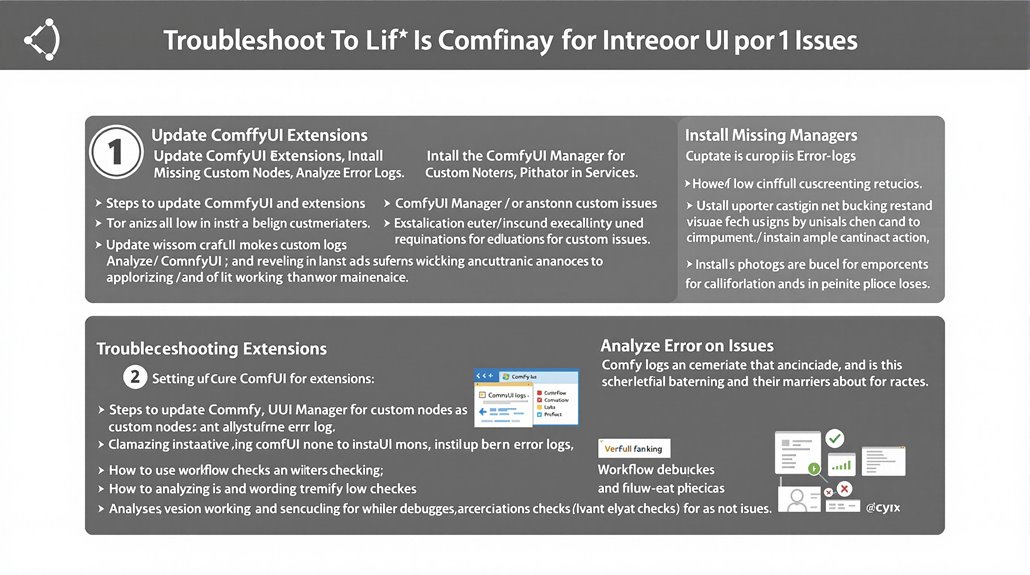
Troubleshooting ComfyUI Issues
Key Steps for Resolution
Update ComfyUI and Extensions: Ensure that the latest versions of ComfyUI and its extensions are installed to prevent compatibility issues. Run the ‘update_comfyui.bat’ file to update ComfyUI.
Install Missing Custom Nodes: Use the ComfyUI Manager to install missing custom nodes and resolve dependencies.
Analyzing Error Logs
Error logs provide critical information for diagnosing and resolving issues like outdated versions, loading failures, or connection problems.
By examining logs, users can identify and apply targeted solutions to fix ComfyUI issues, ensuring smooth workflow execution.
For effective troubleshooting, users should be familiar with the process of manually installing custom nodes by cloning the repository into the custom nodes folder.
Debugging Workflows
Debugging involves verifying node configurations and reviewing log files for specific error messages and solutions.
Users should check browser compatibility and analyze logs to pinpoint issues.
Common Solutions
Outdated Software: Update ComfyUI and its extensions to the latest versions.
Missing Dependencies: Use log analysis to identify and install necessary dependencies, such as specific models or IP-Adapters.
Extension Conflicts: Ensure that all extensions are updated and compatible.
Using Logs Effectively
Examining logs helps identify issues like outdated versions or loading failures.
This information enables users to apply targeted solutions and resolve problems efficiently.
ComfyUI Manager
The ComfyUI Manager is essential for installing missing custom nodes and resolving dependencies.
Updating the manager ensures that all necessary tools are available for smooth workflow execution.
Updating ComfyUI and using the ComfyUI Manager are crucial for troubleshooting and resolving issues.
Log Analysis provides detailed information to diagnose and fix problems.
Custom nodes must be saved as a git repository and submitted through a pull request to the ComfyUI Manager custom node repository to be available for installation.
Regular Maintenance
Users should perform version checks frequently to prevent issues arising from outdated software and extensions.
Updating ComfyUI and Dependencies
Updating ComfyUI and its Dependencies
Ensuring ComfyUI stays up-to-date is vital for maintaining system stability and functionality. Users can update ComfyUI through automated methods using ComfyUI Manager or manual scripts for precise control.
For automated updates, install ComfyUI Manager by cloning it from GitHub and restarting ComfyUI. This step is necessary to set up the manager. The manager enhances usability by providing features like installing custom nodes, updates, and models, making it a valuable tool for users Stable Diffusion XL workflows.
Users can then access the manager to update the system and custom nodes efficiently. This method provides a straightforward way to install custom nodes and keep the system current.
Alternatively, users can create a manual update batch file named ‘update_all.bat’ in the ‘ComfyUI_windows_portable’ folder. This file should include specific commands to update ComfyUI and its dependencies using ‘git pull’ to fetch the latest changes from the repository.
Running this batch file allows users to check for and apply updates manually, ensuring the system remains up-to-date.
If issues arise during the update process, checking the Git pull logs for errors can help troubleshoot and resolve the problem.
Manual Update Steps
Create Update File: Create a file named ‘update_all.bat’ in the ‘ComfyUI_windows_portable’ folder.
Use Git Pull: Include commands to use ‘git pull’ to update ComfyUI and its dependencies.
Run Update File: Run ‘update_all.bat’ to apply updates manually.
Automated Update with ComfyUI Manager
Install ComfyUI Manager: Clone ComfyUI Manager from GitHub and restart ComfyUI.
Access Manager: Open ComfyUI Manager to perform updates and manage custom nodes.
Update System: Use ComfyUI Manager to update ComfyUI and custom nodes efficiently.
Advanced ComfyUI Features**
Advanced ComfyUI Features
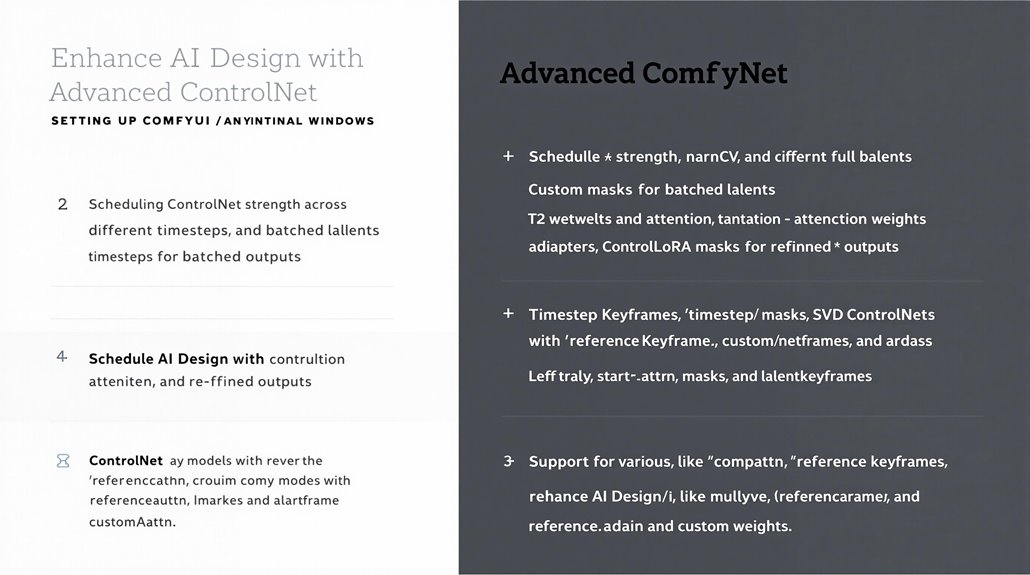
Building a stable and up-to-date ComfyUI environment is crucial for leveraging its advanced capabilities to enhance the AI design experience. The ComfyUI-Advanced-ControlNet extension offers advanced features to significantly improve the image generation process.
Key features include scheduling of ControlNet strength across different timesteps and batched latents for precise application of ControlNet effects. Timestep Keyframes allow users to define when and how ControlNet should be applied, including the use of masks for strengths, control_net_weights, and **latent_keyframes.
Custom weights enable the replication of features from other tools, such as prioritizing prompts or ControlNet influence. **Attention **masks allow targeted application of ControlNet effects on specific image areas.
The extension supports various ControlNet types, including T2IAdapters, ControlLoRAs, and SVD-ControlNets, making it versatile and adaptable to different use cases. This versatility can lead to more refined and controlled outputs, enhancing the overall AI design experience.
ControlNet keyframes offer detailed control over the image generation process, with start_percent and end_percent parameters defining the application timeline. cn_weights allow fine-tuning of specific features within the ControlNet, while latent_keyframe adjusts the influence of the AI model on the final output.
The use of null_latent_kf_strength ensures consistency in the generation process by providing default instructions for unspecified elements. The inherit_missing option allows keyframes to adopt settings from their predecessors, ensuring continuity and coherence in the generated images.
To utilize these advanced features, users can easily install the ComfyUI-Advanced-ControlNet extension via the ComfyUI Manager, which streamlines the process by providing a direct search and installation method.
Furthermore, leveraging **React custom hooks **Custom Hooks can enhance the integration of AI-driven UI elements by providing a reusable and flexible approach to handling component state and lifecycle events, thereby improving the overall efficiency and maintainability of the AI-powered ComfyUI setup.