
Table of Contents Toggle
- Running Stable Diffusion on Google Colab with AUTOMATIC1111
- Configuration Steps
- Further Exploration
- Key Considerations
- Setup and Usage
- Understanding Advanced Models
- Best Practices
- Advanced Features
- Key Takeaways
- Setting Up Google Colab
- Understanding AUTOMATIC1111
- Signing Up for Colab Pro
- Opening Quick Start Guide
- Installing Models and Extensions
- Using Ngrok for Display Issues
- Running AUTOMATIC1111 on Colab
- Advanced Features and Extensions
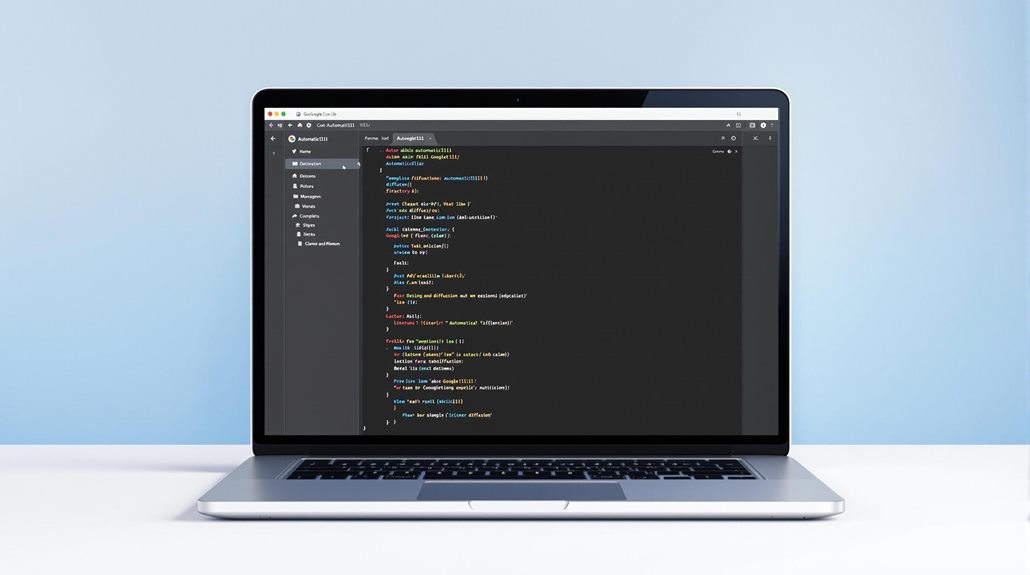
Running Stable Diffusion on Google Colab with AUTOMATIC1111
To get started with running Stable Diffusion on Google Colab using AUTOMATIC1111, you’ll need to set up a Google Colab notebook and configure it to use GPU resources for optimal performance.
Configuration Steps
Integrate Google Drive for seamless access and sharing of notebooks and models. A subscription to Colab Pro or Pro+ is necessary due to Google’s restrictions on free accounts.
Utilize the AUTOMATIC1111 Quick Start Guide notebook, available in the community or documentation, to execute the setup steps.
Install necessary models and software packages by running all code cells in the setup stage. This ensures you have the right tools to generate AI art efficiently.
Further Exploration
Run all cells in the setup stage to ensure everything is correctly installed and configured.
Explore the GUI features to understand how to optimize resources and use advanced settings for efficient AI art generation.
Understand model management by placing model files in specific folders within Google Drive, which can then be accessed by the notebook.
Restart the notebook after adding new models to ensure they are recognized.
Key Considerations
GPU Runtime: Ensure you select GPU in the runtime settings for the best performance.
Model Selection: Understand which models are available and their specific use cases. For example, v2.1-768 requires Colab Pro for high-resolution generation.
Driving AI: Automatic1111 on Google Colab provides a powerful toolset for AI art, simplifying the process for creators.
Setup and Usage
Setup: Copy the notebook to your Google Drive and follow the setup steps.
Run Cells: Execute each cell to set up the environment and connect to Google Drive.
Model Installation: Place model files in the appropriate folders within Google Drive.
Start Generating: Use the provided link to access the web UI and start creating AI art.
Understanding Advanced Models
v1 and v2 Models: Recognize the differences and limitations of each model type, such as the need for negative prompts in v2 models.
SDXL Models: Understand how to use SDXL base and refiner models, including setting VAE to automatic or none.
Additional Extensions: Learn how to install extensions and use additional models like GFPGAN and RealESRGAN for specific tasks.
Best Practices
Efficiency: Optimize your usage by understanding session times and the benefits of Colab Pro and Pro+.
Model Management: Regularly update and manage models to ensure you have the latest and most efficient tools.
Security: Be mindful of security by using password protection and adhering to privacy guidelines.
Advanced Features
GFPGAN: Use this model to refine face details in your AI-generated art.
RealESRGAN: Understand how to use this model to enhance resolutions and detail in your art.
Extra Arguments: Learn how to use additional settings to fine-tune your AI art generation process.
Key Takeaways
Run Stable Diffusion on Google Colab – AUTOMATIC1111
To set up Stable Diffusion on Google Colab:
Create a new notebook and change the runtime type to GPU.
Integrate Google Drive for storage.
Key Steps:
Set Up Notebook: Create a new Google Colab notebook and switch to GPU runtime.
Launch GUI: Follow the Quick Start Guide to run the Stable Diffusion GUI.
Integrate Drive: Save model files to Google Drive and ensure enough free space.
To access AUTOMATIC1111:
Use the AUTOMATIC1111 Quick Start Guide notebook and execute the code cells.
Place model files in corresponding folders on Google Drive.
Troubleshooting Tips:
– Ngrok for Display Issues: Use ngrok for a secure HTTP tunnel if Gradio doesn’t work properly.
Key Takeaways:
Create a New Notebook: Set up a Google Colab notebook with GPU runtime.
Integrate Google Drive: Save model files and generated images to Google Drive.
Execute Quick Start Guide: Run the AUTOMATIC1111 notebook to install necessary models and software packages.
Setting Up Google Colab

Google Colab Setup for Stable Diffusion
Running Stable Diffusion effectively requires a solid understanding of Google Colab’s initial setup requirements. Signing up for a Google Colab Pro or Pro+ plan is crucial for accessing the necessary computational resources. Free accounts have limitations that may hinder the intensive computational needs of Stable Diffusion.
To start, access Google Colab through a web browser using your Google account. Create a new notebook by clicking the “New notebook” button.
Change the runtime type to GPU to utilize the necessary hardware for deep-learning scripts. Ensure a stable internet connection and sufficient storage, preferably integrated with Google Drive for seamless access and sharing of notebooks.
Once your environment is set, open the provided Quick Start Guide notebook for AUTOMATIC1111. Follow the step-by-step instructions to set up and run the Stable Diffusion GUI in Google Colab. This involves setting up the username and password, selecting the models to load, and launching the application.
By following these steps, you will successfully run Stable Diffusion in Google Colab.
Key Steps for Running Stable Diffusion:
1. Setup Google Colab: Access Google Colab through your web browser using your Google account. Create a new notebook and change the runtime type to GPU.
2. Configure Storage: Integrate Google Drive for easy access and sharing of notebooks.
3. Launch Stable Diffusion: Follow the step-by-step instructions in the Quick Start Guide notebook to set up and run the Stable Diffusion GUI.
Important Considerations:
Ensure a stable internet connection.
Select the appropriate models for your needs.
Utilize Google Drive to share and access notebooks efficiently.
Understanding AUTOMATIC1111
Understanding AUTOMATIC1111
AUTOMATIC1111 is a powerful GUI for Stable Diffusion, offering extensive features and an intuitive design that make it essential for users aiming to explore the full potential of AI image generation. Its capabilities include Dreambooth model training and support for installing extensions like CivitAI and multi-diffusion, enhancing its versatility and accessibility for non-coding users.
The GUI incorporates various features that enhance user experience and performance. For instance, it supports over 20 samplers and includes advanced settings for detailed control over image generation[3].
Users can also customize the interface, use batch processing, and take advantage of inpainting and outpainting tools for image editing.
Features and Design
The GUI incorporates various features that enhance user experience and performance. For instance, it supports over 20 samplers and includes advanced settings for detailed control over image generation[3].
Users can also customize the interface, use batch processing, and take advantage of inpainting and outpainting tools for image editing.
Key Capabilities
Customizable Interface: Users can tailor the interface to suit their preferences and working styles.
Advanced Settings: Detailed control over sampling methods, steps, and CFG scale allows for refined image generation.
Extensions and Plugins: Additional functionalities like multi-diffusion and CivitAI enhance its versatility.
User Benefits
Users can leverage AUTOMATIC1111’s extensive features to generate high-quality images with precise control over various parameters. The tool’s intuitive design makes it accessible and user-friendly.
It caters to both beginners and advanced users looking to explore AI image generation. Community support is also available, further aiding in the learning process.
Getting Started
To start using AUTOMATIC1111, users need to install Python and Git, and download the latest Stable Diffusion model weights.
Following a straightforward setup process, users can access the GUI, which is typically available at a local URL after initialization[4].
Practical Tips
Optimize Performance: Adjust sampling steps and model configurations for efficient processing.
Experiment Creatively: Use post-processing tools and explore different styles for enhanced results.
Troubleshooting: Refer to community forums and tweak settings to resolve issues such as slow processing or output quality[3].
Signing Up for Colab Pro
Colab Pro Subscription for Stable Diffusion
Signing up for Colab Pro is essential to run Stable Diffusion with AUTOMATIC1111 efficiently. This plan offers 100 compute units per month, suitable for moderate resource needs.
Benefits of Colab Pro
Colab Pro provides access to more powerful GPUs, enabling smoother operation of Stable Diffusion with AUTOMATIC1111.
Users need a valid payment method and a Google account to initiate the setup process.
Managing Your Subscription
Subscription management can be done through the Google Admin Console or Google Workspace settings.
Users can easily manage their compute units to ensure efficient use of resources.
Choosing the Right Plan
Colab Pro+ offers 500 compute units, suitable for heavy workloads.
This plan is ideal for users who need extensive resources for their projects.
Setting Up AUTOMATIC1111
After signing up for Colab Pro, users can set up AUTOMATIC1111 by following a simple step-by-step guide.
This process includes setting up the username and password, loading the necessary models, and starting the AUTOMATIC1111 GUI.
Paid Plan Requirements
Running Stable Diffusion on Google Colab
To run demanding AI models like Stable Diffusion efficiently, you need substantial computational resources. Google Colab’s free tier doesn’t provide enough power, so signing up for a paid plan is necessary.
Colab Pro Plan
The Colab Pro plan is a suitable option, offering 100 compute units per month, equivalent to about 50 hours on a standard GPU. This plan also provides access to premium GPUs like the A100 processor, which speeds up model training and execution, particularly for tasks like training Dreambooth models.
Paid Plan Benefits
Paid plans offer the necessary GPU resources to run the AUTOMATIC1111 interface efficiently. Choosing the right plan based on usage needs is crucial.
For users who intend to run demanding AI models like Stable Diffusion, a paid plan like Colab Pro or Colab Pro+ is essential to ensure smooth execution.
Premium GPUs for Efficient Execution
The availability of premium GPUs in paid plans ensures fast execution of models. This is critical for tasks that require quick model training and generation, such as training Dreambooth models with Stable Diffusion.
Selecting the Right Plan
To run Stable Diffusion models without any issues, consider purchasing a paid plan that fits your computational needs. Colab Pro, starting at $9.99 per month, provides the necessary resources to run Stable Diffusion efficiently.
Benefits Comparison
For smooth execution of demanding models like Stable Diffusion, a Colab Pro plan provides several key advantages. Premium GPU access with an A100 processor significantly speeds up model training and execution, allowing users to generate images and train models at faster rates, thereby increasing productivity.
Colab Pro offers 100 compute units per month, equivalent to about 50 hours on a standard GPU, which enables more extensive and frequent use of stable diffusion models. This upgraded hardware ensures smoother and faster performance, reducing waiting times for image generation and model loading.
Users of Colab Pro also receive priority access to resources, minimizing the risk of disconnections or resource limitations during sessions. Better resource allocation allows for the handling of larger models and more complex tasks without encountering memory or computational limitations.
This makes Colab Pro indispensable for those heavily reliant on AI models like Stable Diffusion.
Colab Pro+ further extends these benefits by providing 500 compute units per month, making it ideal for users with heavy workloads. This plan offers background execution of longer-running sessions, enabling tasks to continue even after closing the browser, thus enhancing workflow efficiency.
Choosing the right plan depends on specific needs. For moderate resource requirements, Colab Pro offers sufficient support. For users needing more comprehensive resources and longer execution times, Colab Pro+ is the better option.
Setup Process**
Setup Process for Stable Diffusion on Google Colab
To run Stable Diffusion effectively on Google Colab, you need to secure a subscription to Colab Pro or Colab Pro+. This is because the free version does not provide sufficient computational resources.
The Colab Pro plan offers 100 compute units per month, which is equivalent to about 50 hours on a standard GPU. This ensures ample time to work with Stable Diffusion without computational constraints.
Accessing the Quick Start Guide
Access the Quick Start Guide notebook designed for AUTOMATIC1111 users. Ensure you have a Google account to sign up for the Colab Pro or Pro+ plan and access necessary computational resources.
Following these steps will enable you to run Stable Diffusion on Google Colab with ease and efficiency.
Key Benefits of Colab Pro
Premium GPUs: Necessary for the smooth operation of Stable Diffusion.
Extended Runtime: Colab Pro keeps running for up to 24 hours even with the tab closed.
Getting Started
Access Quick Start Guide: Use the AUTOMATIC1111 Quick Start Guide notebook.
Sign Up for Colab Pro: Ensure you have a Google account to access Colab Pro or Pro+.
Run the Notebook: Execute the notebook to set up Stable Diffusion on Google Colab.
Opening Quick Start Guide
To set up the Stable Diffusion application on Google Colab, follow these steps:
Accessing the Guide
Register on the site if you haven’t already.
Click on the provided notebook link in the Quick Start Guide.
This step ensures you have the necessary instructions and setup for using AUTOMATIC1111 in Colab.
Setting Up and Running Stable Diffusion
Open the Stable Diffusion notebook in Google Colab.
Follow the instructions in the guide to set up and run the application within the Colab environment.
Important Considerations
Follow the instructions carefully to ensure a successful setup.
Troubleshoot any issues that may arise during setup by referencing the guide or seeking additional resources.
Accessing the Notebook
Accessing Stable Diffusion on Google Colab
To run Stable Diffusion on Google Colab, you need to access the Quick Start Guide notebook, which requires site membership and access.
Signing Up for a Paid Plan
Sign up for a Colab Pro or Pro+ plan. Google has blocked the free usage of Stable Diffusion, making a paid plan necessary to ensure you have the necessary resources to run Stable Diffusion.
Opening the Notebook
Open the Quick Start Guide notebook through the provided link or by searching for it within the Colab environment.
Entering Credentials
Enter your username and password as prompted in the notebook. This step is required to start using AUTOMATIC1111.
Installation Process
Click the Play button on each cell, starting with setting up your username and password, followed by selecting the models to load.
The notebook will install A1111 and models in the Colab environment, preparing your Google Colab setup for running Stable Diffusion.
Launching Stable Diffusion
Follow the ‘gradio.live’ link to start AUTOMATIC1111.
Enter the username and password you specified in the notebook to access the AUTOMATIC1111 GUI.
Running the Guide
To run the Quick Start Guide for AUTOMATIC1111 on Google Colab, sign up for a Colab Pro or Pro+ plan. This step is necessary to access the necessary computational resources.
Open the Quick Start Guide notebook through links in the AUTOMATIC1111 community or documentation. Enter your username and password in the notebook to secure your session and protect your work.
Select the models you want to load, using default settings for first-time users or customizing as needed. Click the Play button to start installing AUTOMATIC1111 and the selected models in the Colab environment.
Follow the gradio.live link provided to start AUTOMATIC1111 and log in using the specified username and password to access the GUI.
Paid plans are required to use Stable Diffusion on Google Colab, as Google has blocked free usage. Colab Pro or Pro+ plans offer more powerful GPUs and longer session times, making them suitable for frequent use.
Ensure all code cells are run one-by-one to set up the SD runtime and install necessary software packages. Model installation involves saving the model to your Google Drive, which is only needed the first time you run the notebook.
To use AUTOMATIC1111, go through the setup steps, including connecting to Google Drive and running all cells in the setup stage. This will save generated images to your drive and prevent work loss when the session ends.
Choose the appropriate model version, such as v2.1-768 model for high-resolution images, which requires a high RAM instance available with Colab Pro. Adjust settings in Stable Diffusion to use the correct VAE and explore different models like SDXL for advanced features.
Key Points:
Paid Colab Plans: Necessary for using Stable Diffusion due to Google’s restrictions on free Colab accounts.
Model Selection: Choose from various models like v2.1-768 for high-resolution images or SDXL for advanced features.
Setup and Installation: Run all cells in the setup stage and save models to Google Drive for first-time use.
Using AUTOMATIC1111: Access the GUI by following the gradio.live link and logging in with your specified username and password.
Colab Pro Benefits: Offers more powerful GPUs and longer session times, making it suitable for frequent use.
Installing Models and Extensions

Installing Models and Extensions in Stable Diffusion on Google Colab
To install models in Stable Diffusion on Google Colab, use URLs for checkpoint and LoRA models, ensuring to remove everything after the first question mark (?) in the URL. This method ensures the correct file is downloaded and utilized by the notebook.
Using Additional Models
Create an API key on CivitAI and enter it in the ‘Civitai_API_Key’ field to access a broader range of models available for use in the notebook.
Installing Extensions
For installing extensions, use GitHub URLs. For multiple extensions, separate the URLs with commas. This allows for the installation of various extensions, such as CivitAI and multi-diffusion extensions.
Restarting the Notebook
After adding new model files or extensions, restart the notebook to ensure they are recognized and available for use. This ensures a smooth and efficient workflow with Stable Diffusion on Google Colab.
Model File Management
Save model files in the corresponding folders in your Google Drive. For example, checkpoint models go in ‘AI_PICS > models > Stable-diffusion’, and LoRA model files go in ‘AI_PICS > models > Lora’. This organization helps in managing and accessing models more efficiently.
Using Ngrok for Display Issues
Secure Public Connection with Ngrok
To use ngrok, create a free account on ngrok.com and verify your email address. This gives you an authentication token necessary for authenticating your ngrok session within the Colab notebook.
Setting Up Ngrok in Colab
Copy the authentication token from your ngrok dashboard and paste it into the designated field in your Colab notebook. This setup enables a secure public connection to your GUI via ngrok.
Running Ngrok in Colab
Start the notebook with ngrok by clicking the Play button. Once the notebook is running, follow the link provided by ngrok to access the GUI.
You may encounter safety warnings when accessing the link, but these can be safely ignored as you are the creator of the link generated by ngrok.
Resolving Display Issues with Ngrok
By following these steps, you can resolve display issues and access the GUI securely using ngrok. Ngrok provides a secure tunnel that allows you to share your locally-running services with others over the internet.
Using Ngrok Authtoken
To set up your ngrok authtoken in Colab, use the command ‘ngrok authtoken xxxxxxxxxxxxx’, replacing ‘xxxxxxxxxxxxx’ with your actual authtoken. This ensures authentication and security for your ngrok session.
Starting Ngrok Tunnel
Invoke ngrok from Python and start tunneling/connecting. For example, if your GUI is running on localhost port 8050, use ‘public_url = ngrok.connect(port = ‘8050’)’.
This command opens a secure HTTP tunnel to the specified port, making your GUI accessible via a public URL provided by ngrok.
Accessing the GUI
Print the ‘public_url’ to get the actual public URL where the GUI is being tunneled. You can then share this URL with others to access the GUI securely over the internet.
Running AUTOMATIC1111 on Colab

Setting Up AUTOMATIC1111 on Google Colab
To successfully set up AUTOMATIC1111, start by opening the Quick Start Guide notebook. Signing up for a Colab Pro or Pro+ plan is necessary to access the required computational resources since free Colab accounts are blocked from using Stable Diffusion.
Once the notebook is open, users need to set their username and password before proceeding to select the models they want to load. Default settings are available for new users.
Clicking the Play button starts the installation of A1111 and models in the Colab environment.
Model Installation can be done using URLs or by placing them in specific folders on Google Drive, such as ‘AI_PICS/models/Stable-diffusion’ for checkpoint models. Restarting the notebook makes the new models visible.
Resolving Display Issues involves creating a free ngrok account, copying the auth token, and pasting it into the notebook if Gradio doesn’t work properly. Following these steps ensures a successful setup of AUTOMATIC1111 on Google Colab.
Key Steps for Setup:
Open the Quick Start Guide notebook.
Sign up for a Colab Pro or Pro+ plan.
Set up username and password in the notebook.
Select and load models, using default settings if necessary.
Click the Play button to start the installation.
Restart the notebook after installing new models to make them visible.
Troubleshooting:
Use ngrok for a reliable connection if needed.
Place models in the correct folders on Google Drive.
Ensure enough free space (at least 10 GB) in Google Drive.
Advanced Features and Extensions
Maximizing AUTOMATIC1111 on Google Colab
Exploring Advanced Features and Extensions
Using AUTOMATIC1111’s advanced features and extensions on Google Colab significantly enhances the capabilities of Stable Diffusion. Key extensions improve user control and image quality.
ControlNet and Deforum
ControlNet integrates custom models from the ‘AI_PICS/ControlNet’ folder for copying composition, pose, and text effects. Deforum creates videos from text prompts with detailed setup and usage tutorials.
Regional Prompter and After Detailer
The Regional Prompter allows different prompts for different regions of the image for detailed generation.
After Detailer fixes faces and hands using the ‘adetailer’ feature.
Openpose Editor
The Openpose Editor edits control images for precise pose manipulation with ControlNet.
These extensions collectively provide robust tools for advanced image manipulation.
Installation
Users can install extensions via the extensions tab in AUTOMATIC1111 using GitHub URLs.
This integration maximizes Stable Diffusion’s functionality on Google Colab.
Enhancing Image Quality
ControlNet and Deforum extensions offer advanced tools for controlling image composition and generating videos.
Regional Prompter and After Detailer enhance detail and realism.
Openpose Editor refines pose manipulation for precise control.
Extension Installation
Users can utilize the extensions tab in AUTOMATIC1111 to install extensions from GitHub repositories using their URLs.
This simplifies the process and expands functionality.