

ComfyUI Installation Steps:
To set up ComfyUI on Windows, download the official package from the ComfyUI Github Repository and extract it using 7-Zip or similar unzipping software. Place the extracted files in a local directory, ensuring they match the specified ComfyUI File Directory.
Starting ComfyUI:
In the unzipped directory, you’ll find two critical files: ‘run_cpu.bat’ and ‘run_nvidia_gpu.bat’. Select the appropriate file based on your computer’s graphics card. If you have an NVIDIA GPU, double-click ‘run_nvidia_gpu.bat’. If not, use ‘run_cpu.bat’. This simple step will launch ComfyUI.
Additional Considerations:
After launching ComfyUI, it’s essential to add a checkpoint model to the ‘models/checkpoints’ folder for optimal performance. For troubleshooting and peak performance, ensure you’ve followed these steps correctly and have the necessary dependencies installed.
Model Setup:
Download and add your preferred Stable Diffusion models to the ‘models/checkpoints’ folder within the ComfyUI directory. This step is crucial for ensuring ComfyUI functions properly and efficiently.
Common Issues:
Ensure you’ve correctly identified and extracted the right files and that you’re launching ComfyUI with the appropriate ‘.bat’ file for your system. If you encounter issues, verify that the unzipped directory matches the ComfyUI File Directory structure.
Successful Launch:
Upon successfully launching ComfyUI, you’ll see a message indicating the server has started and providing a URL to access the GUI. If your browser doesn’t open automatically, you can navigate to the specified URL to access ComfyUI.
Table of Contents Toggle
Key Takeaways
Setting Up ComfyUI on Windows
Download Official Package: Download ComfyUI from the official GitHub Repository’s ReadMe section.
Unpack Files: Use unzipping software to extract files to a local directory.
Start ComfyUI: Double-click ‘run_nvidia_gpu.bat’ for NVIDIA GPU or ‘run_cpu.bat’ for other graphics cards.
Important Hardware Requirements:
8GB+ system RAM
40GB+ SSD hard disk space
NVIDIA GPU with 4GB+ VRAM recommended for optimal performance.
For proper functioning, checkpoint models should be placed in the ‘ComfyUI\models\checkpoints’ directory.
Install ComfyUI Essentials

Installing ComfyUI on Windows
To install ComfyUI on Windows, start by downloading the official package from ComfyUI’s Github Repository. Click the “Direct Link to download” in the ReadMe section to ensure you get the correct integrated package for Windows installation.
Extract the downloaded files to a local directory using unzipping software. Confirm that the extracted files match the ComfyUI File Directory section and identify ‘run_cpu.bat’ and ‘run_nvidia_gpu.bat’ in the unzipped directory.
It is crucial to meet the minimum hardware requirements, specifically ensuring your system has at least 8GB of system memory for optimal performance.
Select the appropriate ‘.bat’ file based on your graphics card and double-click to start ComfyUI. ‘run_nvidia_gpu.bat’ is recommended for Nvidia GPU users, while ‘run_cpu.bat’ is for those without a compatible GPU.
Verifying Package Integrity
Validate the package integrity by verifying that the downloaded file matches the expected version. Store the package in a local directory for installation and ensure a smooth network connection for the first run.
Launching ComfyUI
Upon launching, confirm that ComfyUI has been successfully launched by seeing the “Starting server” message and the specified URL to access the GUI. If the browser does not start automatically, you can access the GUI manually using the provided URL.
Troubleshooting
To avoid common installation issues, follow these steps carefully. Always verify package validation to guarantee a smooth installation process.
For troubleshooting, ensure that the ComfyUI directory contains the necessary checkpoint models. You can download models from the official repository or other Stable Diffusion GUI sources and place them in ‘ComfyUI\models\checkpoints’.
System Requirements
Ensure your system meets the necessary requirements: a decent NVIDIA GPU with at least 8GB of VRAM, a modern processor, 16GB or more RAM, and sufficient storage space for models and generated images.
Additional Steps
Download a checkpoint model and place it in the appropriate folder. Run ComfyUI according to your hardware configuration. The GUI will load the default text-to-image workflow, allowing you to select a model, enter prompts, and generate images.
Node-Based Workflow
ComfyUI uses a node-based GUI to create and manage workflows visually by connecting different tasks, similar to building with Lego blocks.
Configure System Requirements
Configuring System Requirements for ComfyUI
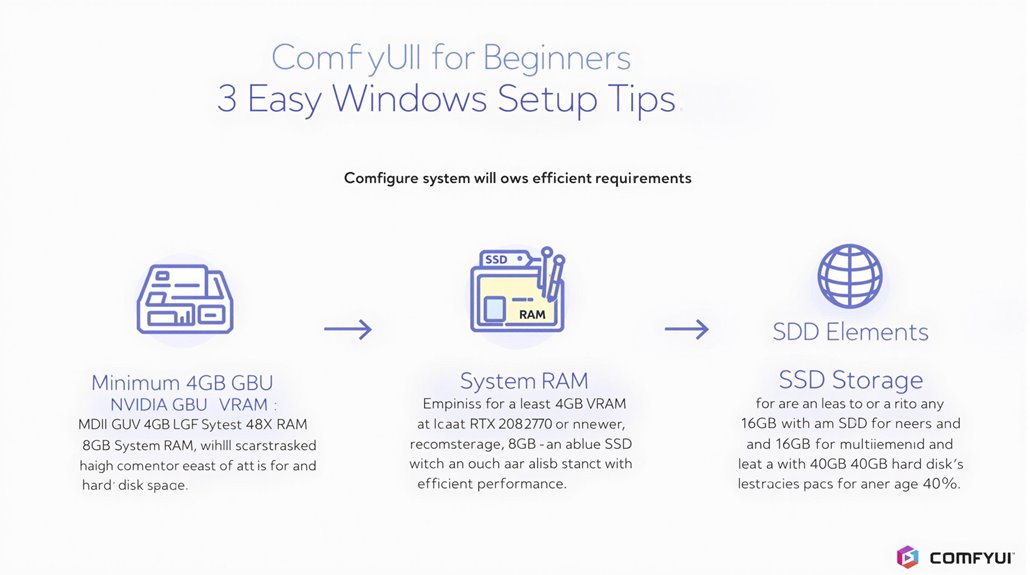
ComfyUI’s smooth operation and peak performance depend on meeting specific system requirements. The minimum GPU requirement is an NVIDIA GPU with 4GB VRAM.
For robust image generation capabilities, an NVIDIA RTX 2070 or newer with 8GB+ VRAM is recommended. Older models like GTX 1060 have basic support but may perform slower.
System RAM should be at least 8GB, with 16GB or more recommended for smooth multitasking. Storage should be on an SSD with at least 40GB hard disk space.
A Python environment and libraries like ‘torch’ and ‘transformers’ are necessary software dependencies. For those without sufficient GPU capabilities, the ‘–cpu’ option allows for CPU-only use, albeit with slower speeds.
Optimizing Performance
Upgrading to an RTX 3060 or higher GPU can significantly enhance performance.
Ensuring at least 32GB of system memory is also crucial for heavy workloads. Starting with the current configuration and upgrading hardware as needed guarantees superior performance and efficiency.
Key Hardware Recommendations
NVIDIA RTX 2070 or newer for robust image generation capabilities.
At least 8GB of system RAM, with 16GB or more for smooth multitasking.
SSD with at least 40GB hard disk space for efficient storage.
Python environment and necessary libraries for software dependencies.
RTX 3060 or higher GPU for enhanced performance.
At least 32GB of system memory for heavy workloads.
Additionally, ComfyUI runs locally, leveraging Stable Diffusion Integration to provide users with full control over their creative workflows. ComfyUI is primarily designed to make AI image generation accessible, relying on Stable Diffusion Models to transform text descriptions into vivid images.
Start ComfyUI
Setting Up ComfyUI
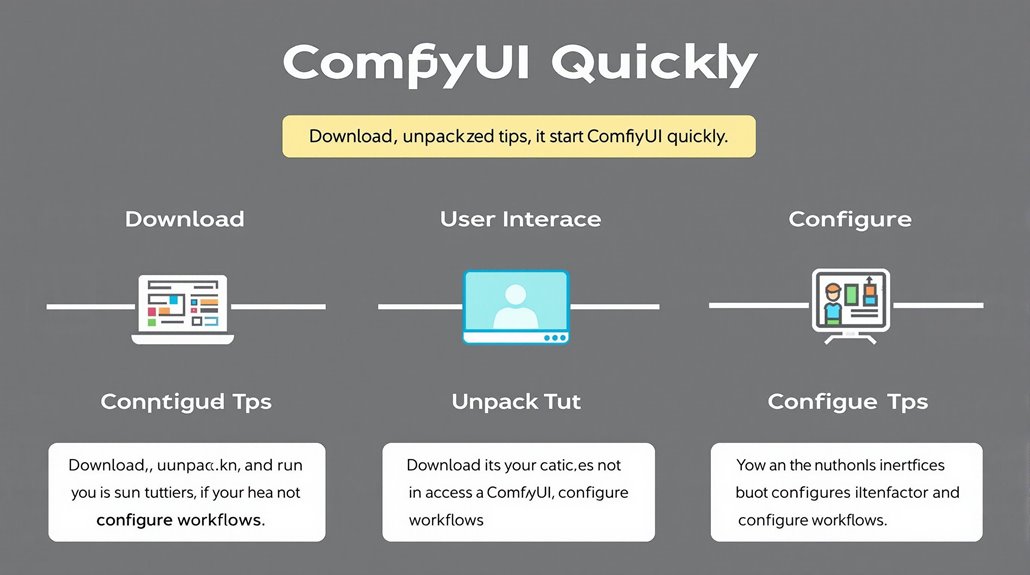
To start ComfyUI quickly, download the ComfyUI_windows_portable package from its official GitHub repository. Follow the installation instructions in the README section for Windows.
Unpacking and Running ComfyUI
Unpack the downloaded file and run the executable file that matches your system’s graphics card. For Nvidia users, run ‘run_nvidia_gpu.bat’. ComfyUI is a node-based GUI, allowing users to construct workflows by chaining different blocks (nodes) together. It is essential to use a tool like 7-Zip or WinRAR to extract the files, as the download file is approximately 1.3 gigabytes.
Once launched, access the user interface by going to the specified URL, typically ‘http://0.0.0.0:8188’, which may vary depending on your device display.
Configuring Workflow
After launching ComfyUI, configure your workflow by loading the default text-to-image workflow and browsing the canvas.
The ComfyUI Manager can be installed by cloning the repository via the command prompt, allowing for easy installation and updating of custom nodes to enhance your user experience.
Key Steps for Launching ComfyUI
Download the ComfyUI_windows_portable package.
Unpack the file and run the appropriate executable file based on your system’s graphics card.
Access the user interface at the specified URL, such as ‘http://0.0.0.0:8188’.
Configure your workflow using the default text-to-image workflow and canvas.
Install the ComfyUI Manager for custom node installation and updates.
Ensuring Compatibility
Guarantee a compatible environment and follow the provided instructions for a quick and successful launch of ComfyUI.
Ensure your system meets the minimum requirements, including an NVIDIA GPU with at least 4GB VRAM and 8GB system RAM. The extracted folder should contain a ‘comfy_windows_portable’ directory, which can be moved to a designated folder such as ‘C:\comfy_ui’ to avoid path length issues.